Ok, ok, I promised this awhile ago and now I think I’d better just do it. Since this is my first tutorial, I hope it all makes sense! I found this picture on Pinterest, loved the bag, and wanted to make it. 
The picture on Pinterest lays out all the steps in pictorial format, and it looks pretty straightforward but I thought beginner sewers might be a little confused at some of the steps. So I decided to write out instructions for how I made this cute little bag.

So I chose my fabric and got started!
You’ll need:
– 3x rectangles, 8″x7″, of: 1 main fabric, 1 lining fabric, and 1 batting or fleece.
– 6″ zip
– 1/2″ double-fold bias tape
– coordinating or matching thread, scissors, ruler, fabric pen or chalk
– zipper foot
– split key ring (optional)
First, cut our your main and lining fabrics, and batting.

Pin your main fabric and batting squares together with the right side of the main fabric facing up. Sew a length of bias tape to the shorter side of your main fabric and batting squares. (Check out this tutorial for sewing bias tape if you need help.) Fold over and press. With zip facing up, line up the zip along the bias tape edge and pin in place. Using a zipper foot on your machine, stitch close to the zipper teeth, catching the loose bias tape fold underneath. You should have something like this:

Repeat for the other side of the main fabric/batting squares:

Turn it inside out and stitch a line across the bottom, sewing the bag closed.

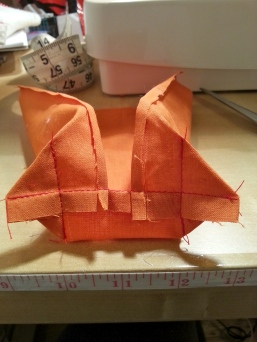
Now, square off the corners, measuring 1″ from the corner (or a 1″ square if you’re using this method.)


With the lining fabric, fold the shorter sides 1/8″ in to the wrong side and press. Leaving a gap of 1/4″ between the folded sides, stitch one side closed (this will be the bottom). Square off the corners.
Turn the lining right side out and line up against the body of the bag (wrong sides together, see picture below).
Hand stitch or machine sew the lining into place around the folded edges, along the zipper. I hand stitched it because positioning it under my machine’s needle was a little awkward, and this was just as fast for me. Turn the bag right side out and stitch across the top. Trim as necessary.
Make a little bias tape tab by cutting a short (roughly 2″) length of bias tape and stitching the long edge closed. Fold it in half, and pin in the middle along the top edge (raw edges together). Stitch a length of bias tape across the top of the bag, tucking the edges of the tape underneath at either end and catching the edges of the bias tape tab in the stitches. Thread the split ring through the tab. Done!


Reblogged this on ncrystalis.
LikeLike